


Taking Land Cover Observations - GLOBE Observer


Taking Land Cover Observations
The app tutorials provide the information required for all parts of a Land Cover observation. After you take the tutorial, the app will walk you through the data collection steps. Additional resources to learn more about land cover and how to take observations can be found below.
Jump to: Tips and Tricks -- FAQs -- Tutorials
How to observe:
- Report on surface conditions - snow/ice, standing water, leaves on trees, etc. (required)
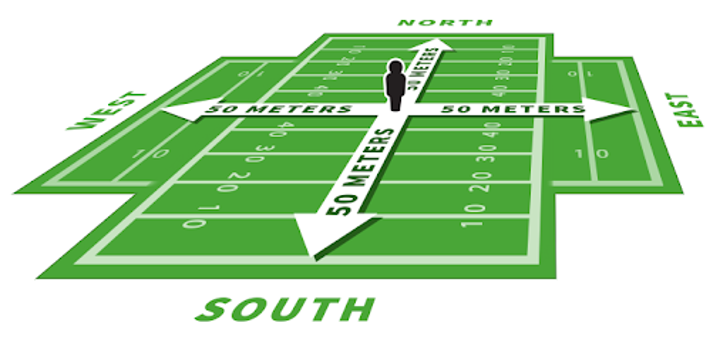
- Photograph the land cover in your surroundings, focusing on the area within the nearest 50 meters or about the size of half a soccer field (required)
- Classify land cover, identifying what types you see (for example, trees, grass or shrubs) and how much of each type you see in each photo (optional)
- Match your observations to a satellite land cover map and point out differences between the satellite data and the ground data (optional)
When to observe:
- Observations can be taken at any time, but repeated observations of the same location throughout the seasons can provide information for phenology, or the study of the seasonal cycles.
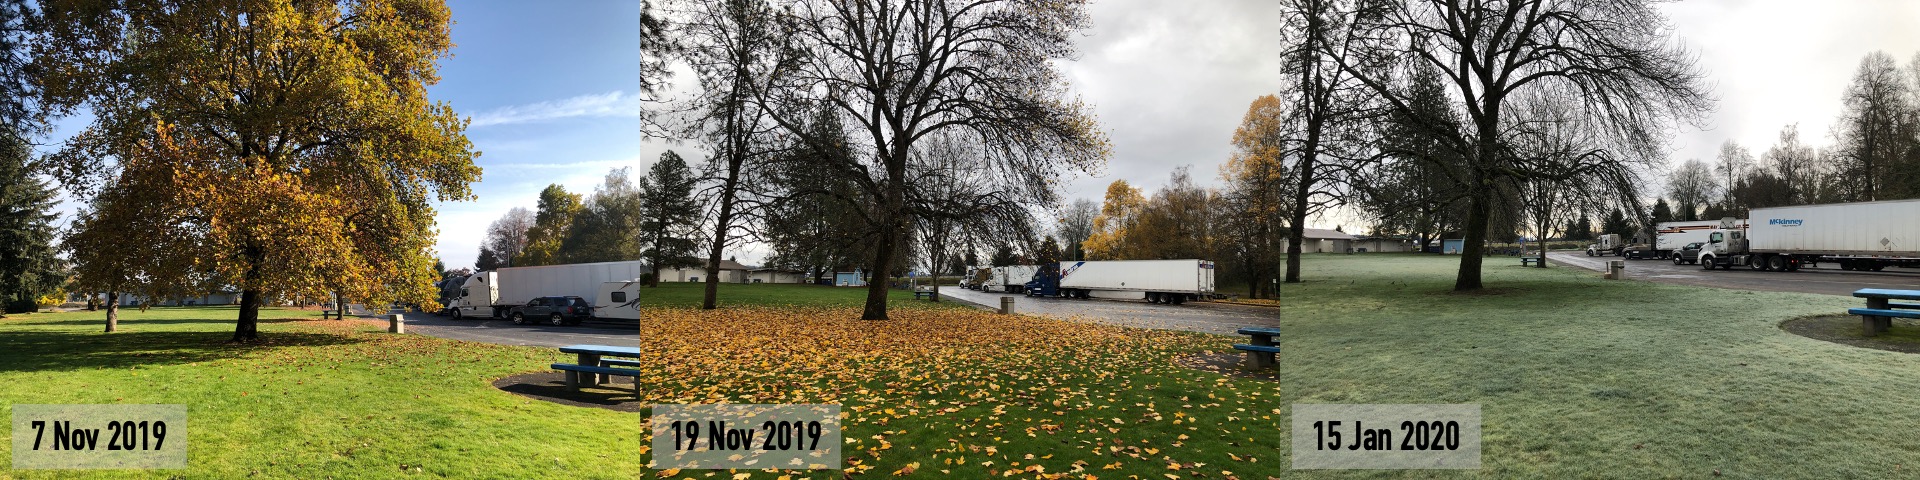
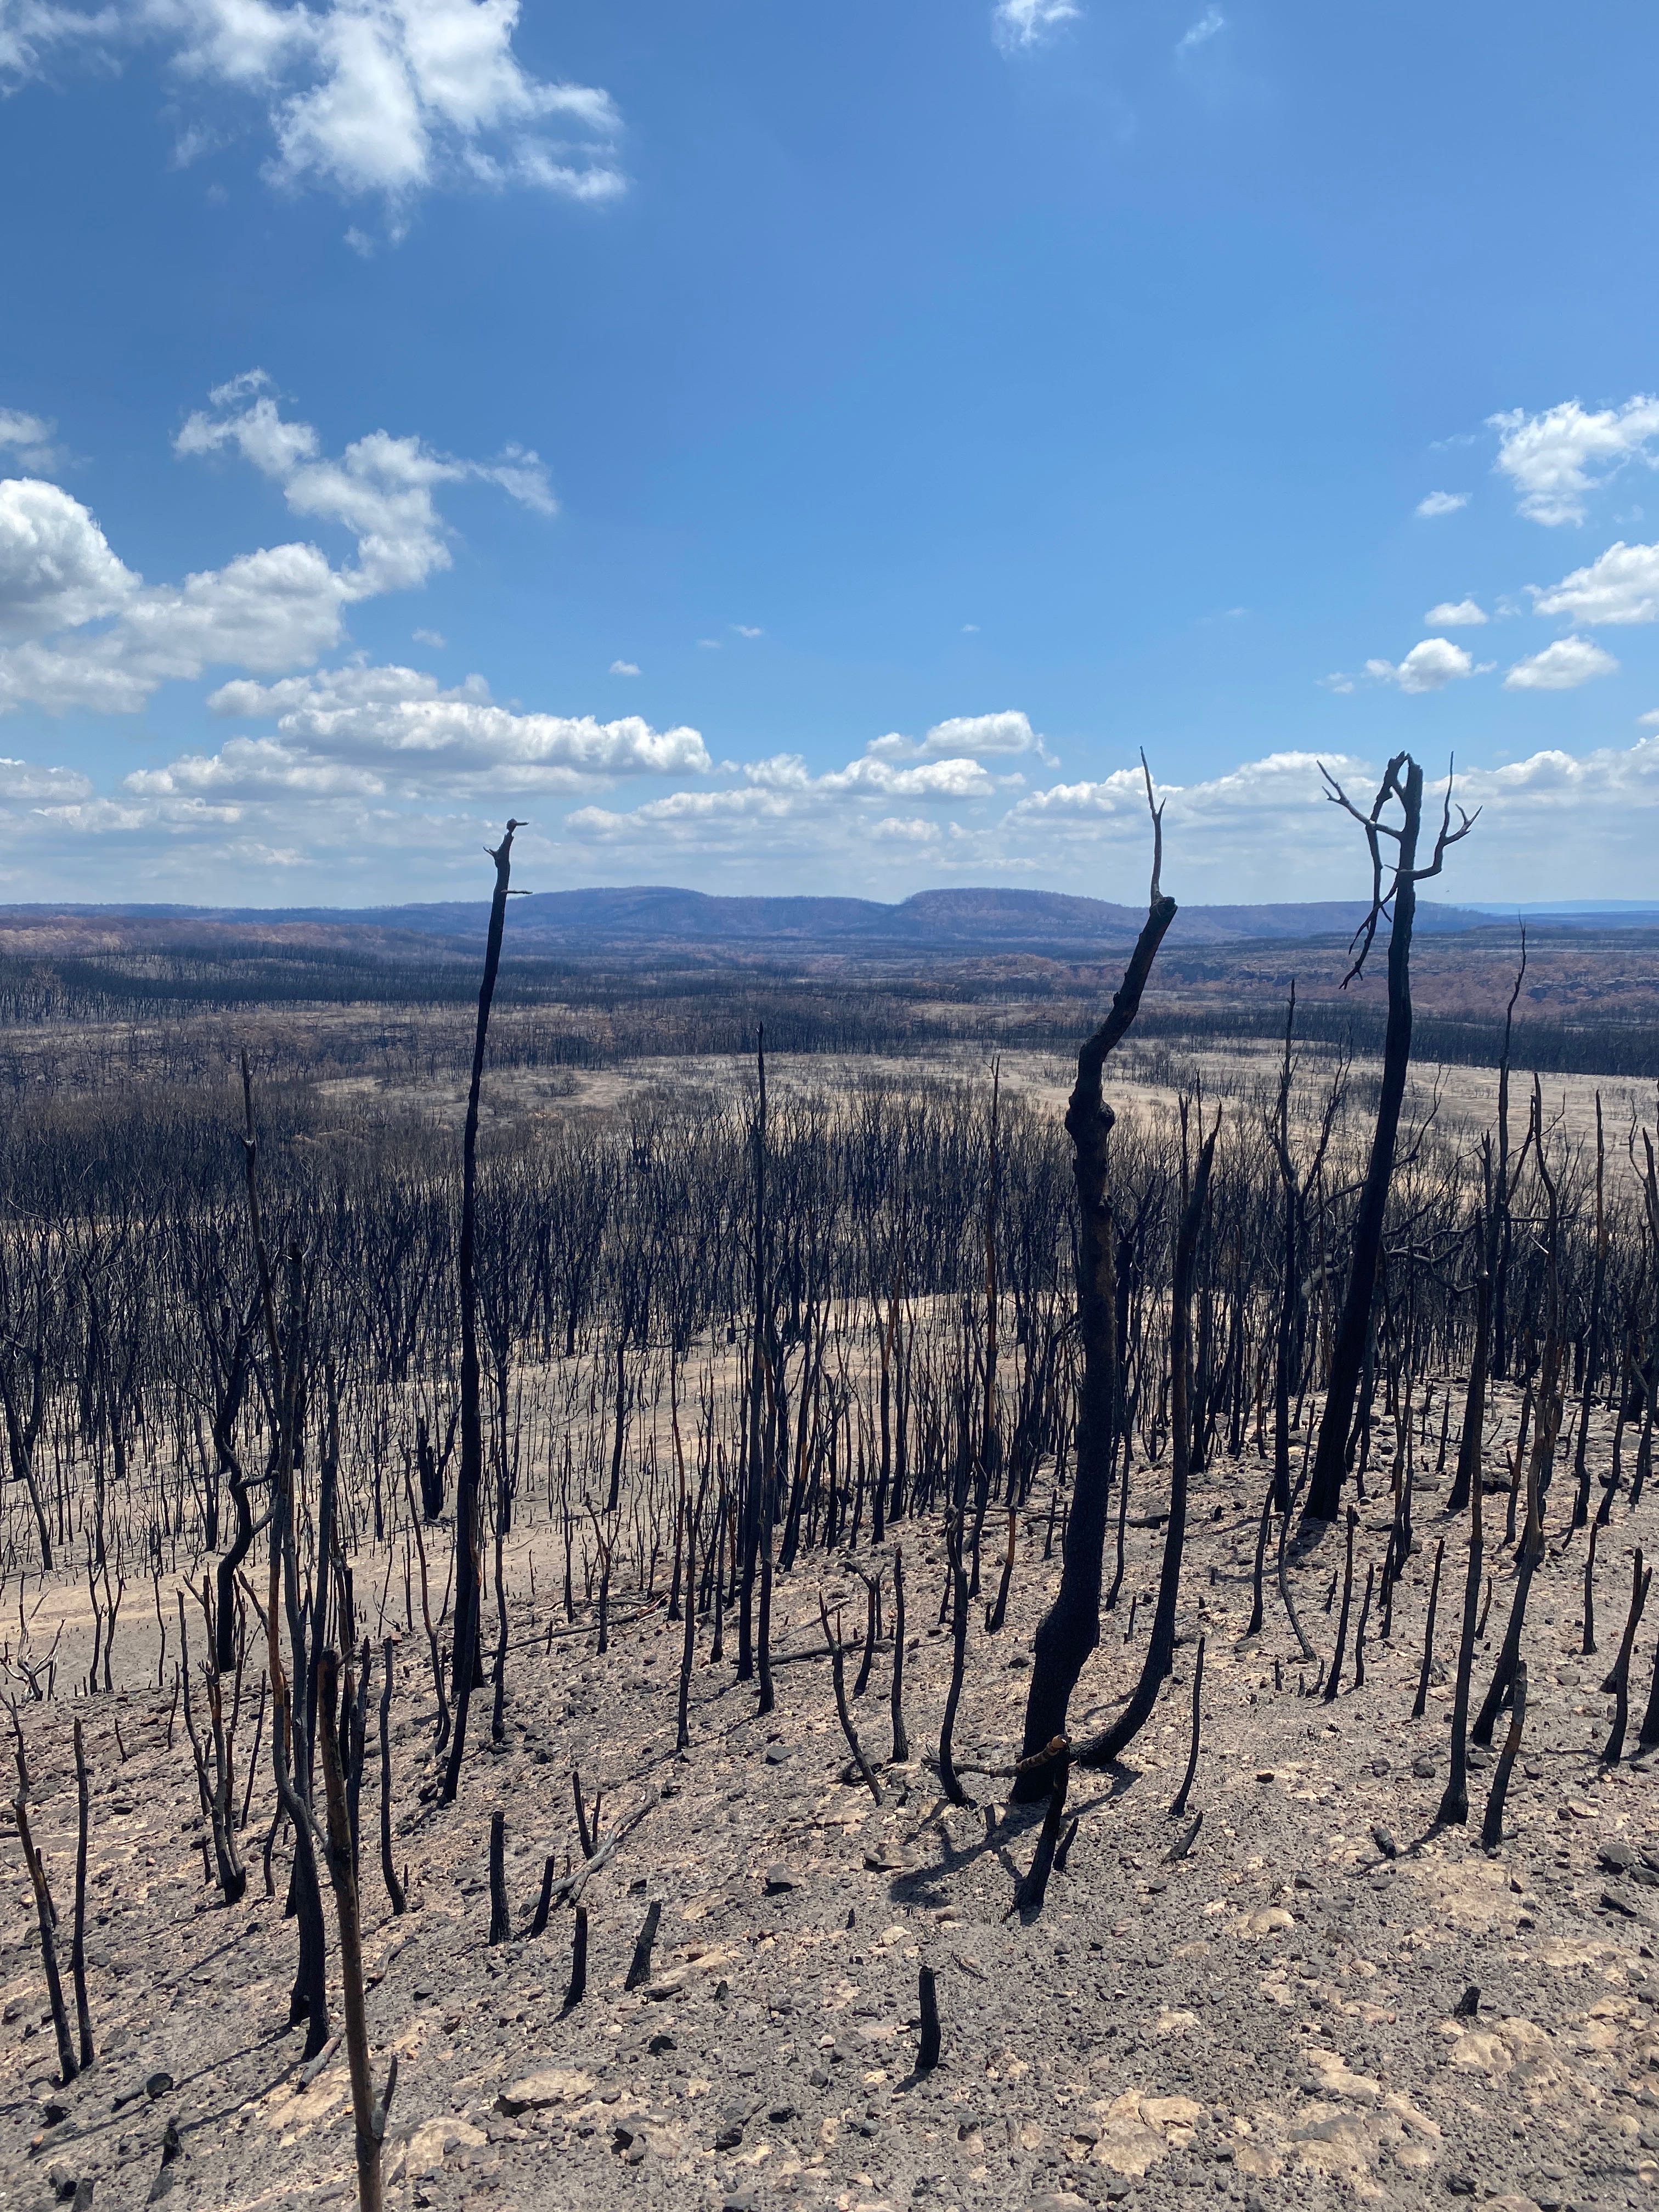
- Observations when there are big changes in the environment can be quite useful - perhaps a building is going up in what used to be an empty field, or after a fire or flood (first making sure it is safe to take observations, of course)
Where to observe:
- Make sure you have permission to take observations in any location you choose to collect data, follow all local laws and guidelines, and avoid having people (especially identifiable faces) in your photographs.
- Be safe when making observations, especially near busy roadways, or areas where the ground is uneven.
- Observations can provide a baseline of land cover as seen from the ground, so getting photographs from a lot of different locations can be very helpful.
- Areas with mixed land cover are fine to observe, but initially, you may want to pick locations that only have one or two types of land cover for easier classification until you get more practice.
- We ask you to observe the land cover in an area 50 meters in each direction, so a 100 meter x 100 meter square. That’s approximately the length of a football field. You might want to take your first observation from such a field to get a sense of the distances. You can also use the “Find Your Pace” activity to determine how many steps you need to take to go 50 meters.
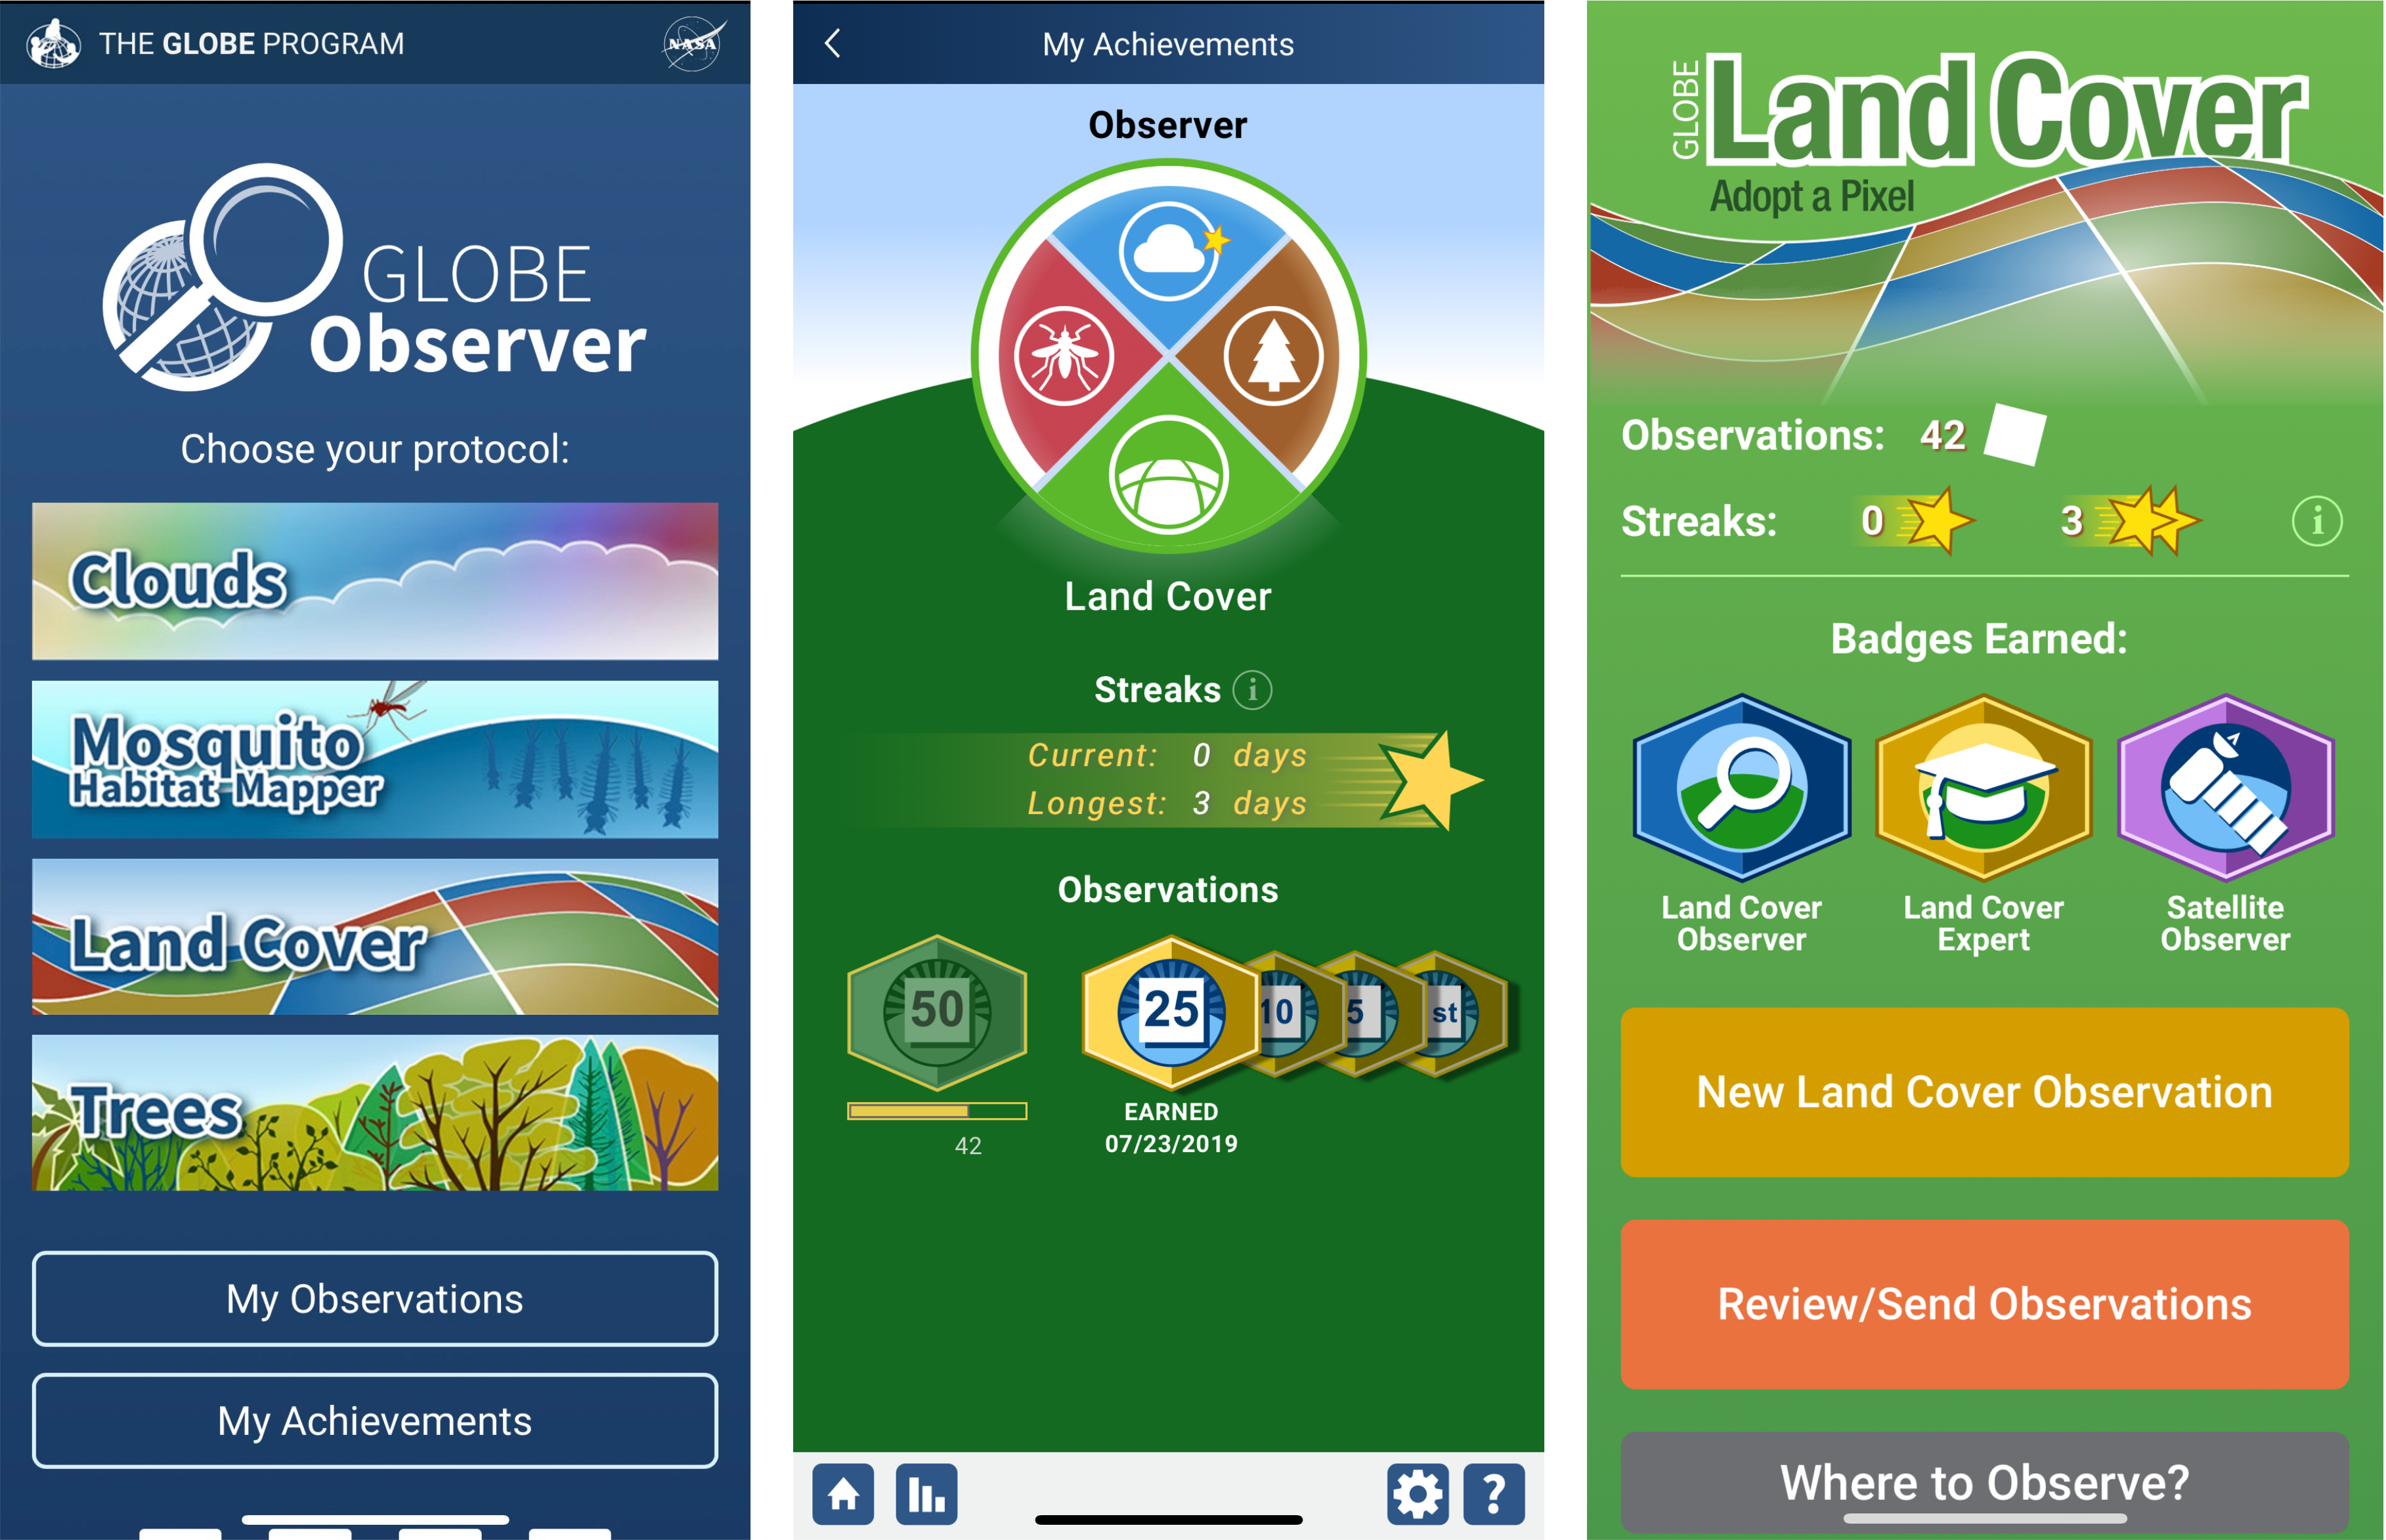
Earn Land Cover Awards:
- As you collect data, you can earn milestone badges for every 1-5-10-25-50-75-100-150-200-250-300-400+ observations you submit under each protocol. You will receive an email with each milestone badge, unless you choose to opt-out under your account settings.
- You can also start a streak by collecting data for more than two days in a row. Missing Saturday and Sunday will not disrupt your streak. Track your badges and streaks under My Achievements on the GLOBE Observer app home screen.
- Learn more.
Frequently Asked Questions - Land Cover Observations
This section is for questions about how to use the app to take observations. If you have an overall app question, not specifically about the Land Cover tool, try the general FAQ page. Science-focused questions (such as why scientists study land cover and the NASA connections to the data) are covered on the Land Cover Science page.
You do not have to do all the steps in the Land Cover protocol. You can simply take photos with your smartphone, submit them, and be done if you like. If you want to take a step further, you can classify the landscape shown in your photos, which will help scientists more easily sort and use your photos. The classification does not need to be done immediately when you take the photos - you can save the observation on your phone, and then go in later and classify the images before submitting (at this time it's not possible to add or edit a classification after the data is in the GLOBE database.) If you want to go even a step further, you can match your classification with satellite data.
One way to learn about 50 meters is to find your average pace (two normal steps) in meters, divide that number into 50, and then to take that number of paces on flat ground. (See the Land Cover Toolkit activity, “Find Your Pace.”) Another way to learn about 50 meters is to measure that length with a tape measure if you have one long enough! 50 meters is equal to 54.7 yards, or about 164 feet.
If you are taking a land cover observation of a forest, urban area, or other place with tall vegetation, you may not be able to see 50 meters. Just report as far as you can see. That observation is still valuable. You can add to the field notes that the view is not clear for a full 50 meters.
Yes, in some circumstances. For example, in a forested area, you might mark tree cover at 100%, but also have shrubs or grasses as some part of the understory, meaning your total percentage cover will be over 100% for that photo.
If that is the case, simply remove that land cover type from the classification list for that photo.
Land Cover Introductory Tutorial
The short animation from the introduction to the Land Cover tool in the GLOBE Observer app, explaining the basics of how to make observations.